Pickling and Curing Guide: Easy Salt-Preserved Recipes for Summer
Pickling and curing bring bold flavor, longer shelf life and old-school kitchen magic back to the table
Story by Lance Hanlin
Long before refrigeration, salt was survival. It preserved the day’s catch, kept vegetables edible through winter and transformed simple ingredients into something deeper, sharper and more flavorful over time. Today, pickling and curing still carry that old-world practicality, but they’ve also become one of the most satisfying ways for home cooks to experiment in the kitchen. A little salt and patience can completely change an ingredient.
Pickling vs. curing
While the two are often grouped together, they work a little differently. Pickling preserves food using acidity, usually vinegar, along with salt, sugar and spices. The result is bright, tangy and crunchy. Curing relies primarily on salt to draw moisture from food and concentrate flavor. It changes both texture and taste over time. Both techniques use salt as the backbone.
Brine time: Why salted Water might be the secret to better summer cooking
Brining is one of the easiest ways to improve summer cooking. Whether you’re grilling shrimp, frying chicken or roasting turkey, salt helps meat stay juicy, flavorful and tender from the inside out.
There are two main methods: wet brining and dry brining. Wet brining soaks food in salted water mixed with ingredients like citrus, herbs or spices. Dry brining skips the water entirely, coating meat in salt and refrigerating it uncovered for deeper flavor and crispier skin.
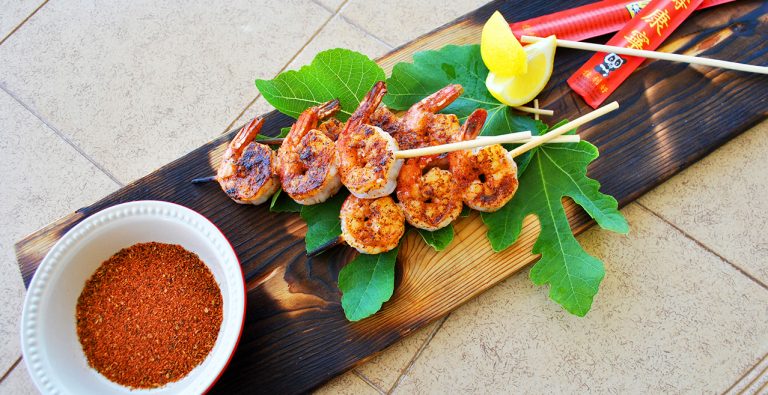
In the Lowcountry, shrimp brines are especially popular during grilling season. A soak with salt, lemon and garlic helps seafood stay succulent over high heat, while buttermilk brines give fried chicken extra tenderness and crunch.
Even leftover pickle juice has value. Some cooks use pickle brine to marinate chicken, brighten potato salad or add tangy depth to pork and seafood.
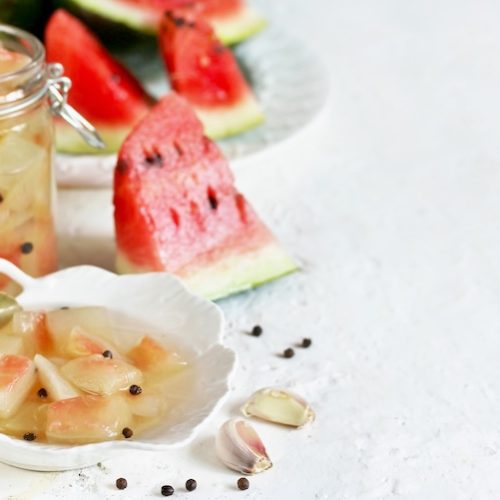
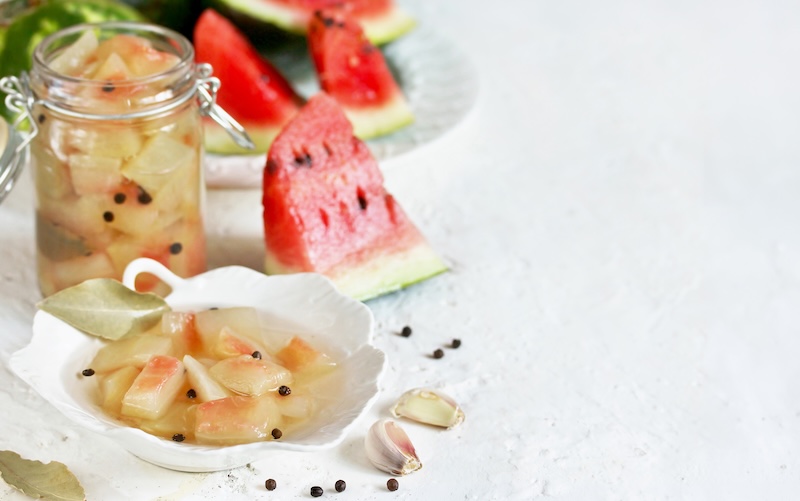
Pickled watermelon rind
Ingredients
- 4 cups watermelon rind peeled and cut into bite-sized pieces
- 1 cup white vinegar
- 1 cup water
- 3/4 cup sugar
- 1 tablespoon kosher salt
- 1 teaspoon whole black peppercorns
- 2 garlic cloves lightly crushed
- 2 bay leaves
- 1 small piece fresh ginger sliced
- Optional: Pinch of red pepper flakes for heat
Instructions
- Trim away the green outer skin and most of the pink flesh from the watermelon rind, leaving only the pale white portion with a slight blush of pink. Cut into cubes or strips.
- Bring a large pot of water to a boil. Add the rind and simmer for 8-10 minutes, just until slightly tender but still crisp. Drain well.
- In a saucepan, combine vinegar, water, sugar, salt, peppercorns, garlic, bay leaves and ginger. Bring to a simmer, stirring until the sugar dissolves completely.
- Pack the watermelon rind into clean glass jars or a large container. Pour the hot brine over the rind until fully covered.
- Let cool to room temperature, then refrigerate for at least 24 hours before serving. The flavor continues to deepen over the next several days. It’s perfect for charcuterie boards, grilled pork, fried chicken or straight from the jar on a hot summer afternoon.
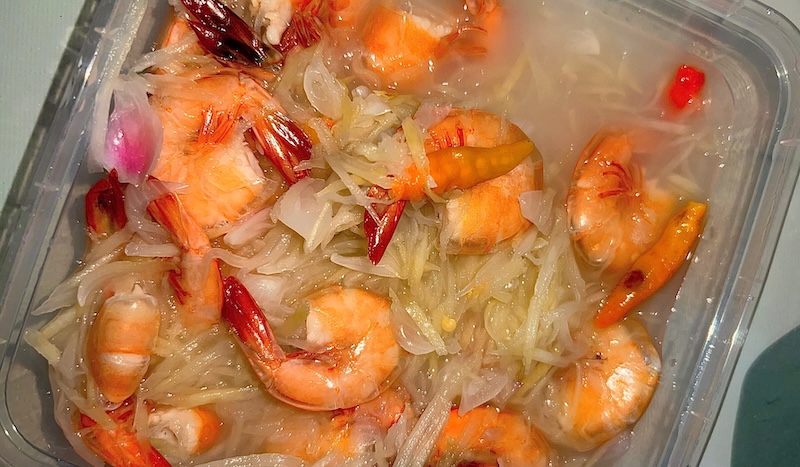
Pickled shrimp
Ingredients
- 2 pounds large shrimp peeled with tails on
- 1 large sweet onion very thinly sliced
- 1/2 cup thinly sliced red onion
- 1 cup white vinegar
- 1/2 cup apple cider vinegar
- 1/2 cup water
- 1/4 cup olive oil
- 2 teaspoons kosher salt
- 1 teaspoon sugar
- 1 teaspoon celery seed
- 1 teaspoon whole black peppercorns
- 1 teaspoon crushed red pepper flakes
- 2 cloves garlic thinly sliced
- 2-3 small hot peppers sliced
- 1 lemon thinly sliced
Instructions
- Bring a large pot of salted water to a boil. Add shrimp and cook just until pink and opaque, about 2-3 minutes. Drain immediately and cool completely.
- In a saucepan, combine white vinegar, apple cider vinegar, water, olive oil, salt, sugar, celery seed, peppercorns, garlic and crushed red pepper flakes. Bring to a gentle simmer for 2-3 minutes, stirring until salt and sugar dissolve. Remove from heat and let cool slightly.
- In a large glass container or airtight dish, layer shrimp, onions, hot peppers and lemon slices. Pour the brine mixture over the top until everything is submerged.
- Cover and refrigerate at least overnight, preferably 24 hours, allowing the flavors to fully develop. Stir once or twice while marinating if possible. Serve it with saltines, cocktail picks, cold beer and a porch breeze.

Salt-cured egg yolks
Ingredients
- 4 large egg yolks
- 2 cups kosher salt
- 1 cup sugar
Instructions
- In a shallow dish or loaf pan, mix together the kosher salt and sugar. Spread about half the mixture evenly across the bottom.
- Using the back of a spoon, create four small wells in the salt mixture. Carefully place one egg yolk into each well, keeping the yolks intact.
- Gently cover the yolks with the remaining salt mixture until fully buried. Cover tightly and refrigerate for 4-6 days.
- Once the yolks feel firm and slightly tacky, carefully remove them from the salt mixture and rinse lightly under cool water. Pat completely dry.
- For a firmer texture, place the yolks on a wire rack and dry in a 150-degree oven for 1 1/2 to 2 hours, or refrigerate uncovered overnight.
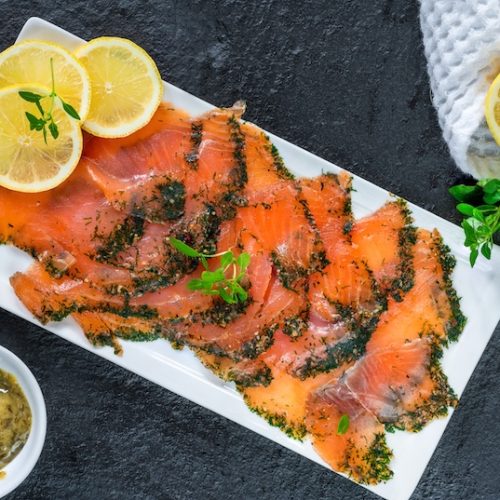
Salt-cured salmon (gravlax)
Ingredients
- 1 pound fresh salmon fillet skin on
- 1/4 cup kosher salt
- 1/4 cup brown sugar
- 1 tablespoon cracked black pepper
- 1 large bunch fresh dill roughly chopped
- Zest of 1 lemon
Instructions
- Mix salt, sugar, pepper and lemon zest together.
- Spread half the mixture in a glass baking dish. Place salmon skin-side down on top. Cover with remaining cure and fresh dill.
- Wrap tightly with plastic wrap and weigh lightly with another dish or pan.
- Refrigerate 36-48 hours, draining liquid once or twice.
- Rinse lightly, pat dry and slice thinly. Serve with crackers, dijon mustard, bagels, crème fraîche or cucumbers.
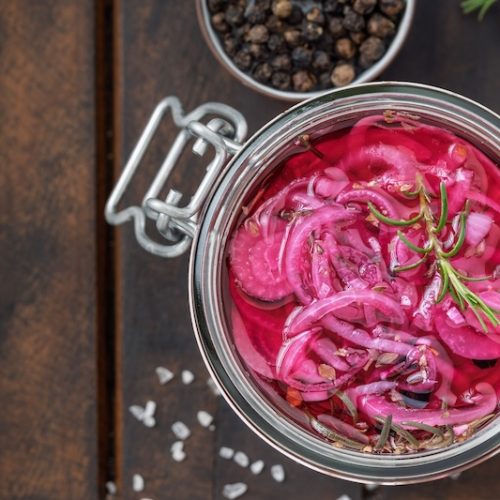
Pickled red onions
Ingredients
- 1 large red onion thinly sliced
- 1 cup white vinegar
- 1 cup water
- 1 tablespoon kosher salt
- 1 tablespoon sugar
- 1 teaspoon black peppercorns
- Optional: Garlic cloves rosemary sprigs, jalapeño slices or fresh dill
Instructions
- Place sliced onions in a clean glass jar.
- In a saucepan, combine vinegar, water, salt and sugar. Bring to a simmer until dissolved.
- Pour the hot liquid over the onions. Add peppercorns and any optional flavorings.
- Let cool, then refrigerate. They’re ready in about an hour and improve over the next day.